Are you interested in embroidery and want to find out more about it? In this post, How to embroider. I’ll show you some simple, effective stitches that you can use in very different ways. In the end, you will find the first embroidery templates with which you will quickly achieve your first success.
Are you interested in embroidery and want to find out more about it?
Direct hit! In this post, I’ll show you some simple, effective stitches that you can use in very different ways. In the end, you will find the first embroidery templates with which you will quickly achieve your first success. Learn to embroider for beginners – the basic stitches.
The yarn
You can use normal thread for embroidery.
Basically, normal sewing threads consist of six individual threads. For these first projects, you can use the yarn as it is. if you want to draw finer lines, to work more delicately you can simply pull the yarn apart and only embroider with, for example, 2 threads.
The beginning & the end of the embroidery

- First, thread the thread into the needle and tie a knot at the end.
- When you have reached the end of your motif or a surface, knot your thread several times on the back so that it cannot slip out again.
Embroidery for Beginners – The Basic Stitches
The backstitch
You can use it to trace contours or draw flower stems. But you can also write lettering.
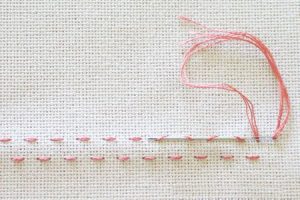
- Put the needle a few millimeters above the beginning of the line you want to stitch through the fabric from the bottom up (until it doesn’t go any further because the knot is against the fabric).
- Then guide the needle through the fabric from top to bottom, exactly at the starting point of your line.
- Now guide the needle back through the fabric from the bottom up, this time a few millimeters away from the first puncture hole.
- you poke again from top to bottom through the fabric, exactly in your first hole.
- Now it goes on and on, along your drawn line, until you have traced your entire picture.
Tips for embroidery:
The more even your stitches are, the more beautiful your stitch pattern will look
Make sure to use small stitches in curves so that the line is really round and not angular
The satin stitch
You use this stitch to “paint” / fill an area.
- For the satin stitch, insert the needle once through the fabric from the bottom up, in the middle of your line.
- From there you stretch the thread straight to the opposite end of your surface and there stitch again from top to bottom through the fabric (if you have a triangular surface, you stitch exactly into the tip of your triangle).
- This is how you proceed now, always pricking from the bottom up and from the top down again. This works just like the backstitch. Except that you are now arranging the stitches side by side.
Tip for the satin stitch: How to embroider
Here it is important that you put the stitches close together, especially if you want to embroider a diagonal line so that there are no corners and edges.
The knot stitch
With the nodules, you can represent flower stamps, add a few highlights here and there or fill in an entire motif. Filling in an entire motif with the knot stitch is quite a lot of work, but the result looks really great.
- To get the nodules, stick the needle once through the fabric from the bottom up, wrap the thread three times around the needle, and then simply stick your needle back through the fabric from top to bottom, very close to the original hole.
Tips for the knot stitch: How to embroider
Do not pull the thread too tight at the end, otherwise, there is a risk of pulling the thread completely through the fabric. Knot stitch is not easy as a beginner. Practice makes perfect here.
To fill in a motif or an area, you have to put the nodules quite close together.
The stem stitch
The name already suggests it. You can use this stitch wonderfully for stalks of grass and tendrils.
- If you want to trace a larger font and already have a little embroidery skill, you can use the stem stitch wonderfully for this.
- Insert the needle through the fabric from the bottom up, right at the beginning of the stem.
- Then make a large stitch forward and put the needle back through the fabric from top to bottom.
- Then you go back again. About halfway through your long stitch, you poke the needle back up from the bottom. Make sure that you always stick out the needle on the same side of the thread – either on the left or on the right.
- From there, go back a long stitch forward and stitch into the fabric from top to bottom. Keep doing this until you are done with the subject.
The Marguerite Stitch: How to embroider
With this stitch, you can very easily depict leaves or flowers.
- Guide the needle through the fabric from the bottom to the top and then back down right next to the puncture site.
- Do not pull the thread all the way through, but let the loop stand.
- At the upper end of your sheet of paper, you stick the needle back through the fabric from the bottom up and pick up the loop by inserting the needle through the inside of the loop.
- Finally, you stick the needle back through the fabric from top to bottom, right at the previous hole.
The rose stitch
You can use this basic stitch to make rose heads.
- Draw a circle and draw five lines from the center outwards to divide it into five equal parts. There always has to be an odd number of lines. If you want to embroider a particularly large flower, you can also insert seven lines in a correspondingly large circle.
- First, you trace the straight lines with a straight stitch. To do this, pierce the needle once from bottom to top directly in the middle of the circle through the fabric and then at the end of the first line from top to bottom again.
- You do that four more times now.
From now on we no longer embroider but weave.
- Pierce the fabric again from the bottom up and alternately go with the needle under one thread and over one the next. Always do this in a circle until you have reached the edge of your circle.
- If you can’t go any further, guide the needle through the fabric from below and knot the thread.
You now know how the basic stitches work. With a little practice, your embroidery skills will grow and even the more difficult stitches such as rose stitching or knot stitching will go out of your hand after a while.
Also Read: How to cook beets


Insightful piece
Gdy zapomnisz hasła do zablokowania ekranu, jeśli nie wprowadzisz prawidłowego hasła, odblokowanie i uzyskanie dostępu będzie trudne. Jeśli okaże się, że Twój chłopak / dziewczyna jest podejrzana, być może pomyślałeś o włamaniu się do jego telefonu Samsung, aby uzyskać więcej dowodów. Tutaj zapewnimy Ci najlepsze rozwiązanie, jak złamać hasło telefonu komórkowego Samsung.
Jeśli myślisz o użyciu aplikacji szpiegowskiej na telefon komórkowy, dokonałeś właściwego wyboru.
Outstanding feature